Introduction
In this article, we will explore the power of Divi’s Contact Form module and its ability to build effective communication channels on your website. Divi, a versatile WordPress theme, offers a user-friendly interface and a wide range of modules to enhance the functionality of your website. By utilizing the Contact Form module, you can create seamless communication channels that allow your visitors to get in touch with you effortlessly. Let’s dive into the process and discover how to leverage this powerful tool effectively.
The Cyber Monday sale has officially begun! For a very limited time, Divi are offering our biggest discount of all time plus free bonus gifts and exclusive perks...and that's just the beginning! Once Cyber Monday is over, this crazy deal won't be back until next year Divi Theme Discount today!
1. Understanding the Importance of Effective Communication Channels
Effective communication channels are essential for any website as they facilitate interaction and engagement with visitors. Here are a few key reasons why building effective communication channels matters:
- Enhanced User Experience: A well-designed contact form provides a user-friendly experience, making it easy for visitors to reach out to you.
- Lead Generation: Contact forms serve as a valuable tool for lead generation, allowing you to collect visitor information for future follow-ups.
- Customer Support: A contact form enables visitors to seek assistance, ask questions, or provide feedback, fostering a positive customer support experience.
- Business Opportunities: Effective communication channels open doors to potential collaborations, partnerships, or business opportunities.
2. Introducing Divi’s Contact Form Module
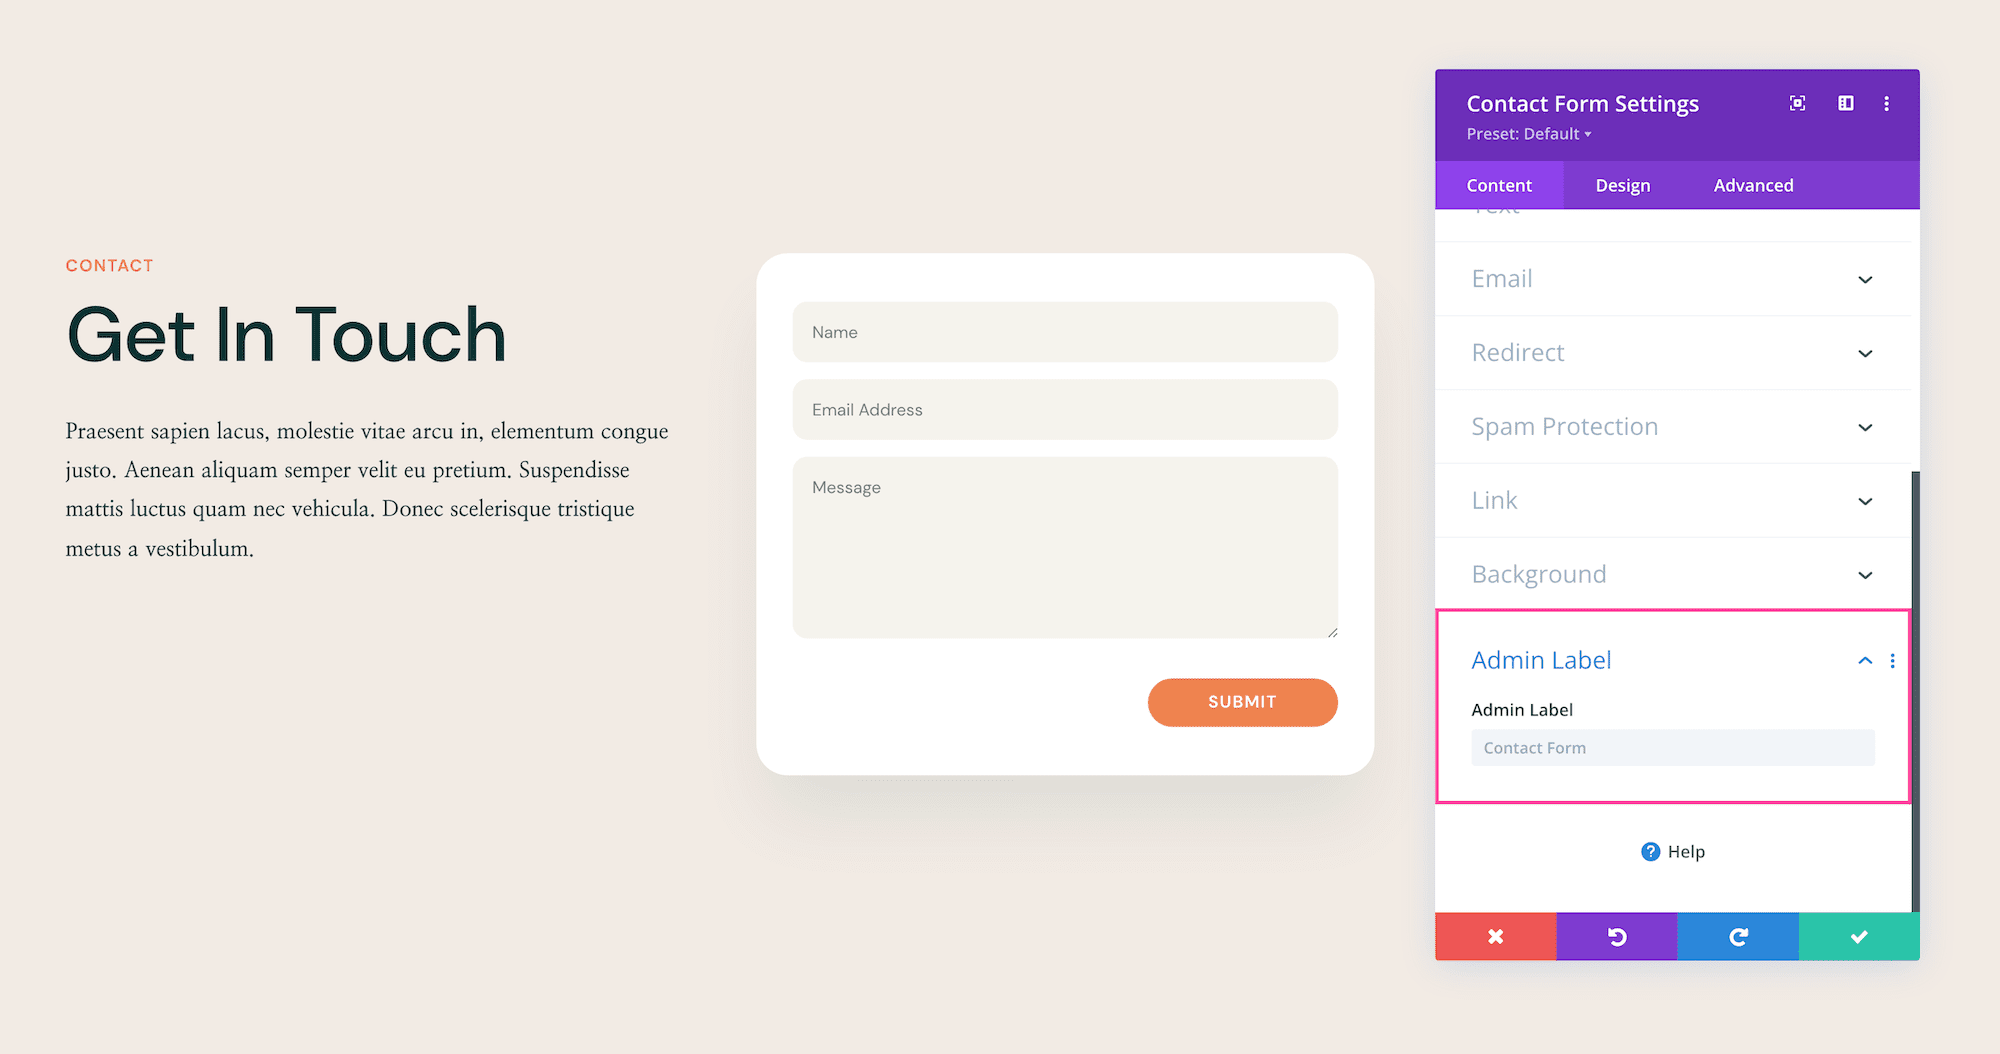
Divi’s Contact Form module is a powerful tool that allows you to create customized contact forms effortlessly. With its intuitive interface and extensive settings, you can tailor the form to your specific needs. Here’s how to get started:
- Login to your WordPress dashboard and navigate to the page where you want to add the contact form.
- Edit the page using the Divi Builder.
- Add a new section or choose an existing one where you want to place the contact form.
- Click on the plus icon to add a new module and search for the “Contact Form” module.
- Select the Contact Form module and configure the general settings, such as form title and description.
- Customize the form fields according to your requirements, including name, email, subject, message, etc.
- Configure additional settings, such as validation rules, success message, error messages, and email notifications.
- Style the contact form to match your website’s design using Divi’s styling options.
- Save the changes and preview the page to see your newly created contact form.
3. Best Practices for Building Effective Contact Forms
To ensure your contact form serves its purpose effectively, consider the following best practices:
- Simplicity: Keep the form simple and easy to understand, avoiding unnecessary fields that may discourage visitors from filling it out.
- Clear Call-to-Action: Use compelling and concise labels for the form submission button, such as “Submit,” “Send Message,” or “Get in Touch.”
- Validation and Error Handling: Implement proper validation to ensure accurate data submission, and provide clear error messages for any validation failures.
- Responsive Design: Optimize your contact form for mobile devices, ensuring it displays correctly and functions smoothly on smartphones and tablets.
- Spam Protection: Incorporate security measures, such as CAPTCHA or reCAPTCHA, to prevent spam submissions and ensure data integrity.
4. Enhancing Communication Channels Beyond the Contact Form
While the contact form is an essential component, consider expanding your communication channels to provide visitors with alternative ways to reach you. Here are a few additional options to consider:
- Live Chat: Integrate a live chat feature that allows visitors to engage in real-time conversations with your team.
- Social Media Links: Include links to your social media profiles, making it easy for visitors to connect with you on their preferred platforms.
- Phone Numbers: Display your contact phone numbers prominently for those who prefer direct communication.
- FAQ Section: Create a comprehensive FAQ section to address common questions and provide self-help resources.
Conclusion
By utilizing Divi’s Contact Form module and implementing effective communication channels on your website, you can enhance user experience, generate leads, and foster meaningful interactions with your audience. Follow the step-by-step instructions and best practices outlined in this article to create a seamless communication experience that leaves a lasting impression.


0 Comments